Setting Up Out-of-Network Printers and Email Servers
Printers
On the Add Printer or Edit Printer dialog, check the This is an out-of-network printer checkbox. When checked, this option indicates this is an out-of-network printer to be used with cloud-based instances of MAPS.
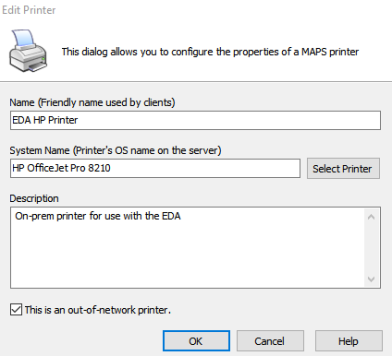
Note: the System Name must exactly match the printer name on the Evisions Delivery App server.
Email Servers
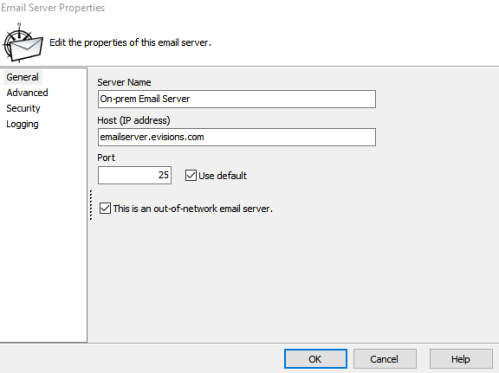
On the Email Server Properties dialog, check the This is an out-of-network email server checkbox. When checked, this option indicates this is an out-of-network email server to be used with cloud-based instances of MAPS.
Authorizing Applications, Users, and Groups
Once the out-of-network option has been checked, you can authorize the printer or email server for use by individual applications, users, and groups. Use the dropdown menu under the authorized for use with pane on the right side of the Printers or Emails -> Servers screen in MAPS Config (or right click on it) and choose Add Application, Add Group, or Add User.
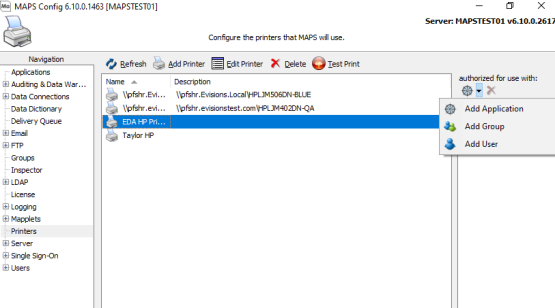
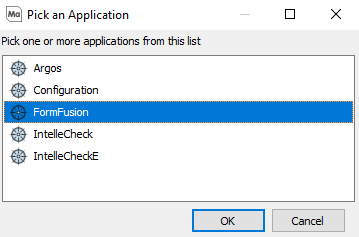
To allow FormFusion to access your out-of-network printer or email server, select Add Application, select FormFusion, and then select OK.
Testing Out-of-Network Resources
To verify that your out-of-network printer was added to MAPS successfully, select the printer and then click the Test Print button at the top of the Printers screen in MAPS Config to send a test page to your printer. Similarly, to verify that your out-of-network email server was added to MAPS successfully, select the email server on the Email -> Servers screen and then click the Test button at the top of the screen.
The tests run for out-of-network resources will appear in the new Delivery Queue screen.
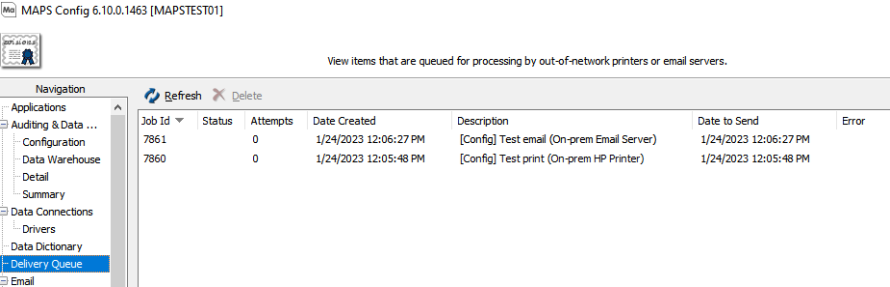
Items in the Delivery Queue are pending job which will be run by the Evisions Delivery App. If these jobs are created while the Evisions Delivery App is running, they will be pulled and executed immediately.
Important: Out-of-network email servers or printers should not be modified if there are jobs pending in the Delivery Queue.